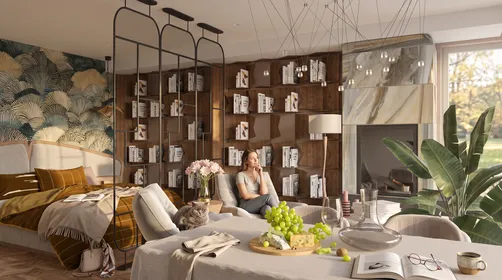
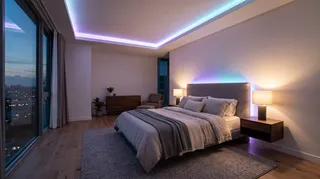
- Bedroom: behind the headboard or inside a ceiling cove, aimed at the wall.
- Desk: behind the monitor or along the rear underside of the desk.
- Living room: behind a media console or beneath a floating shelf.
- Small rental: use a removable mounting method and avoid permanent channels or drilling.
A strip of colored LEDs can make a room feel considered—or like a display aisle if the light is too bright and pointed straight at you. Good rgb room lighting is less about covering every edge in color and more about hiding the source, bouncing light off a surface, and choosing a setting that suits what you’re doing.
This guide walks through the practical decisions: which strip to buy, where to place it, how to install it neatly, and how to tune the color after dark. You don’t need a full smart-home setup to get a pleasing result. Start with one indirect light source, test it in the room, and add more only if the first one leaves a real gap.
Start with the room, not the strip
Before shopping, decide what you want the light to do. A soft glow behind a headboard can make a bedroom feel calmer at night. Light behind a monitor can reduce the harsh contrast between a bright screen and a dark wall. A strip under a shelf can make a reading corner feel layered without taking up floor space.
For rgb room lighting, the surface matters as much as the LEDs. A pale, matte wall reflects light more evenly than a dark, glossy one. A strip aimed at a mirror or directly into your eyes tends to create glare and visible dots. Whenever possible, hide the strip behind a lip, furniture edge, or diffuser so you see the wash of light rather than the individual diodes.
Take a quick look at the room at night, with the overhead light off. Note the surfaces you can bounce light off and where you sit or lie down. Then measure the route you want to illuminate, including corners and the distance to a power outlet. Don’t buy a long strip just because it’s on sale; extra length can mean awkward coils, visible joins, or a controller that ends up in the wrong place.
A few useful starting points:

Choose an LED strip that fits the job
Not all strips behave the same way. Some show separate red, green, and blue points; others mix colors more evenly. Some are designed for simple remote control, while others connect to an app or smart-home system. The right choice depends on where the strip will sit and how often you’ll change its settings.
Check the product details for the strip’s length, power supply, control method, and whether it can be cut at marked points. If you want a continuous line of light in a visible channel, look for a diffuser-compatible strip. For a hidden accent behind furniture, a basic flexible strip may be enough. Don’t assume every strip can be extended or joined in any configuration; follow its stated limits and use the matching power supply.
| Setup | What to look for | Best for |
|---|---|---|
| Basic RGB strip with remote | Simple color and brightness controls | One accent area, occasional changes |
| App-controlled strip | Scheduling, scenes, and phone control | A room where you’ll adjust settings often |
| Strip with a diffuser or channel | Smoother-looking light and a protected edge | Visible runs beneath shelves or cabinets |
| Tunable white plus color | Useful white light as well as color effects | Bedrooms, desks, and multipurpose rooms |
One detail people often overlook is white light. RGB strips can make white by mixing colors, but that may not look like the comfortable, balanced white you want for reading or getting dressed. If the strip will be a regular light source, consider a model that also offers dedicated white LEDs. If it’s purely decorative, color mixing may be perfectly adequate.
For a first project, I’d choose one strip with straightforward controls and a clear return policy rather than buying a complicated kit with features you may never use. Keep the packaging and test the strip before sticking it down. A quick bench test can save you from discovering a dead section after the adhesive is already on the wall.
Install it cleanly, then tune the glow
A tidy installation starts with a dry, dust-free surface. Measure the route twice, test the strip while it’s still loose, and check that the power lead reaches the outlet without crossing a walkway. If the strip has a protective backing, peel it away gradually as you press the strip into place. Rushing the job often leaves bubbles, crooked corners, or a section that lifts a week later.
For a desk or shelf, an aluminum channel with a diffuser can protect the strip and soften the visible points. It’s a more finished option, but it takes extra measuring and may require screws or a suitable mounting method. In a rental, I’d avoid drilling unless you have permission. Removable clips or carefully chosen removable adhesive can be easier to undo, though no adhesive is guaranteed to suit every paint finish. Test a small, hidden area first.
A practical installation sequence:
- Measure the path and mark where the strip will stop.
- Check the strip, controller, and power supply before mounting.
- Clean and fully dry the surface.
- Place the strip so the LEDs face a wall or another reflective surface.
- Route the cable along an edge and keep the controller accessible.
- Turn it on and adjust brightness before deciding the setup is finished.
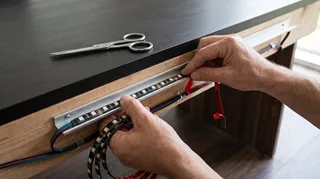

Once it’s installed, start at low brightness. A saturated color can look dramatic in a product photo but feel tiring when it fills your whole field of view. Try a dim teal or blue behind a monitor, a warm amber accent in a lounge area, or a gentle color shift for a short wind-down routine. I prefer a steady, low-intensity setting for everyday use; fast color cycling gets old surprisingly quickly.
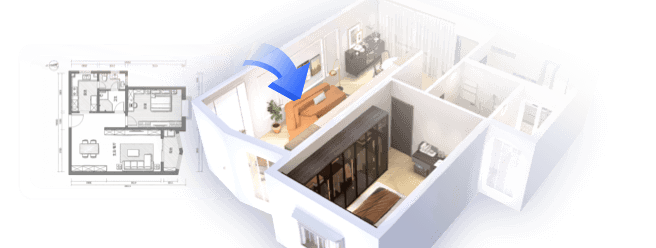
Design Your Desk LayoutIf you’re unsure whether a strip will overpower the furniture or clash with the wall color, sketch the room layout and test the placement before committing. Homestyler can help you think through scale and color relationships before you start sticking anything in place.
Make RGB room lighting feel intentional
The easiest way to make colored light look deliberate is to give it a job. Use one accent to define a zone, then let the rest of the room stay relatively calm. A desk setup might pair a subtle glow behind the screen with a regular task lamp. A bedroom might use a soft wall wash behind the bed while keeping a separate bedside light for reading.
Try these simple combinations:
- For focus: a restrained cool tone behind the monitor, with a separate neutral desk lamp.
- For winding down: low brightness and a slow, static warm or muted color.
- For a media corner: a gentle wall wash behind the console, not a bright strip visible from the sofa.
- For a small room: one hidden strip rather than several competing lines around the ceiling.
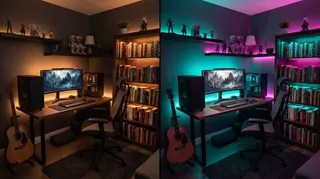

Keep the color palette simple. Two related colors usually feel more settled than a rainbow effect running across every surface. If your walls are already colorful, a dimmer strip can add depth without turning the room into a color test. If the room is mostly neutral, a single accent color can provide contrast without requiring new furniture or paint.
Visualize Your Room’s Color PaletteYou can also preview the overall arrangement in Homestyler before buying extra strips. It’s useful for checking whether a proposed light source makes sense alongside the bed, desk, or shelving—not for predicting the exact brightness or color rendering of a particular LED product.
Common setup mistakes to avoid
Putting the strip where you can see the LEDs. If the light source is visible from your bed or chair, it can feel harsh. Shift it behind a furniture edge or aim it at the wall.
Using the brightest setting by default. Start low and raise the brightness only until the wall wash is visible. The room doesn’t need to glow like a sign.
Ignoring the power route. Plan where the adapter and controller will sit before installation. A beautiful strip with a cable dangling across the wall looks unfinished, and a cable across a walkway is a trip hazard.
Assuming adhesive will come off cleanly. Paint, texture, humidity, and surface preparation all affect how adhesive behaves. Test first, and use a mounting option appropriate for the surface. When removing a strip, go slowly and follow the manufacturer’s guidance rather than yanking it away.
Using color as the only light. RGB accents are not a substitute for task lighting. Keep a separate lamp for reading, cooking, or working, and use the strip to add atmosphere around it.
Start with one well-placed strip
A successful setup doesn’t need to cover the whole room. Pick one spot where indirect light will make a noticeable difference, measure carefully, and test the strip before mounting it. Hide the LEDs, keep the brightness comfortable, and choose a color you’ll still enjoy after the novelty wears off.
Built on technology originally developed at Autodesk, Homestyler empowers anyone to design beautiful, realistic spaces in minutes. Join over 20+ million registered users (platform data, 2026) who have already discovered a smarter way to plan, visualize, and bring their dream homes to life — all from the comfort of a browser.
That’s the core of rgb room lighting: thoughtful placement beats more hardware. If you want to plan the furniture layout and see how an accent might fit the room before you install it, try Homestyler. Then make one small change, live with it for a few evenings, and decide whether the room actually needs another strip.
Дизайн сейчас бесплатно