
- Pick a location you can see from a window or path. Early blooms are easy to miss if they’re tucked behind the shed.
- Check the bulb package for hardiness and planting guidance suited to your area.
- Choose firm bulbs without soft spots, mold, or a strong unpleasant smell.
- Keep bulbs cool, dry, and ventilated until planting; don’t seal them in a damp plastic bag.
- If deer or rodents are a problem, favor bulbs they tend to avoid, such as daffodils, or protect the planting area.
A bare garden in October can feel like a promise you have to remember to keep. Planting bulbs fall is one of the easiest ways to make that promise real: tuck a few firm bulbs into cool soil now, and spring brings crocuses, daffodils, tulips, and other flowers before most perennials wake up.
The trick is less about having a green thumb and more about getting three things right: timing, drainage, and planting depth. This guide walks through choosing bulbs, arranging them for a natural-looking display, and avoiding the common mistakes that leave you with a patchy show. You can start with one small bed or even a patio pot; there’s no need to turn the whole yard into a weekend project.
Start with the right window for planting bulbs in fall
Spring-flowering bulbs need time in cool soil to establish roots before winter. In many regions, that means planting after summer heat has passed but before the ground freezes. The calendar date varies by climate, so use local soil and weather as your guide: aim for cool soil, not a warm spell that encourages early top growth, and don’t wait until the ground is too hard to dig.
Choose a spot that gets good light in spring. Deciduous trees are often ideal: their branches let in sun before the canopy fills out, and the bulbs can bloom before the area becomes shady. Most bulbs also need soil that drains well. If water sits in the bed after rain, improve the drainage or choose a raised bed or container. Soggy soil is a more reliable way to lose bulbs than a chilly night.
Before buying, think about the order you want to see flowers. Snowdrops and crocuses can start the show, followed by daffodils and hyacinths, then tulips. Bloom times overlap, and local conditions shift the schedule, but mixing early, midseason, and later varieties usually gives a longer display than planting one type alone.
A few practical checks before you dig:


How to plant bulbs in fall without guesswork
A good planting session is simple: loosen the soil, set each bulb at the right depth with its pointed end up, cover it, and water if the soil is dry. The familiar rule of thumb is to plant a bulb about two to three times as deep as its height, but the package directions take priority because bulb sizes and recommendations vary. Small crocuses sit much closer to the surface than large tulips.
Spacing is flexible. For a natural drift, plant bulbs in loose groups rather than a ruler-straight row. A handful tossed gently onto the bed can suggest where to plant them, though place each bulb deliberately once it lands. Keep the groupings close enough to read as a patch of color, while leaving room for the mature flowers and foliage.
| Bulb | Typical placement | A useful design note |
|---|---|---|
| Crocus | Shallow, following package depth | Plant in small clusters near paths or lawn edges |
| Daffodil | Medium to deep, depending on bulb size | Strong choice for a repeatable spring display |
| Tulip | Usually deeper than small bulbs | Group several together for a fuller visual effect |
| Hyacinth | Follow package depth and spacing | Place where you can enjoy the fragrance |
For a bed, use a trowel or bulb planter and loosen compacted soil before planting. Set the bulb with the pointed tip upward; if the top is hard to identify, plant it on its side rather than leaving it exposed. Backfill with the same soil, gently firm it, and water once if the ground is dry. Don’t press the soil into a brick.
For a container, use a pot with drainage holes and fresh, well-draining potting mix. Bulbs can be layered at different depths when their planting requirements allow it: larger, later-flowering bulbs lower down, smaller bulbs nearer the surface. Keep bulbs from touching one another or the pot’s sides, and leave enough soil above the top layer. A container dries and freezes faster than a garden bed, so choose a sheltered spot and check it occasionally through winter.


Make a spring display that looks full, not fussy
The most satisfying bulb beds have a little rhythm. Repeat the same color or variety in several groups, then add a few contrasting flowers for punctuation. A single line of identical bulbs can look stiff; a scattered mix can look accidental. Repetition is the middle ground.
I like to plan around what the garden looks like after the flowers fade, too. Bulb leaves need to remain until they yellow naturally so the plant can store energy for next year. That means the bed should have room for foliage to linger. Plant bulbs among emerging perennials or low groundcovers that can eventually soften the leaves, but don’t crowd the bulbs so tightly that air and light disappear.
If you’re layering a container, check the depth and bloom timing of each variety before stacking. The classic “bulb lasagna” approach can work well, but it isn’t a magic shortcut: the pot still needs drainage, enough soil depth, and bulbs suited to your winter conditions. A wide pot gives you more room to arrange layers without forcing bulbs against the sides.
Before you buy, sketch the bed or pot and note the colors, heights, and bloom sequence you want. If you’re coordinating a patio container with a seating area or entryway, Homestyler can help you preview the overall color balance and scale before you commit to a layout. I find that a quick visual plan is especially useful when the garden is small and every pot has to earn its spot.


The small mistakes that can spoil a big spring show
Bulbs are forgiving, but a few avoidable errors can make the display disappointing. Planting too early in warm soil may encourage shoots before winter; planting too late can leave little time for roots to establish. If you’re unsure, follow local planting guidance and the bulb package rather than relying on a fixed date.
Depth matters, but so does drainage. A bulb planted too shallow may be more exposed to temperature swings or animals, while one planted too deep may struggle to emerge. Use the package’s depth recommendation as your baseline, then adjust for your soil and climate only when you have a clear reason.
Here are the problems I see most often:
- Planting in a wet, heavy spot. Move to a better-drained area or improve the bed before planting. Don’t try to solve standing water by adding a thin layer of gravel under each bulb.
- Forgetting which way is up. Pointed end up is the usual orientation. If it’s unclear, planting sideways is safer than guessing and leaving the bulb exposed.
- Cutting foliage too soon. Once flowers fade, remove the spent flower head if you like, but leave the leaves until they yellow and die back naturally.
- Expecting every bulb to return forever. Some varieties naturalize and multiply; others are less dependable in a particular garden. Treat the first season as a useful test and note what performs well.
- Ignoring wildlife pressure. If animals dig up bulbs, use a physical barrier or choose less tempting varieties rather than replanting the same vulnerable bulbs in the same spot.
After planting, mark the area with a simple garden marker or make a note on your phone. It’s surprisingly easy to forget where bulbs are when spring cleanup begins. Avoid digging deeply in that spot until the flowers have emerged and the foliage has finished its cycle.
Plant a little now, thank yourself in spring
You don’t need a perfect plan or a huge order to get started. Choose a sunny, well-drained patch, plant a few varieties at their recommended depth, and group them so the color reads clearly from the places you actually spend time. A small cluster by the front walk can feel more rewarding than a large bed you rarely see.
For planting bulbs fall, the best approach is the one you can repeat: choose bulbs suited to your climate, give them cool soil and drainage, and let the leaves finish their work after flowering. Keep a note of what blooms and when. Next autumn, you’ll know exactly what to add, move, or plant in a bigger drift.
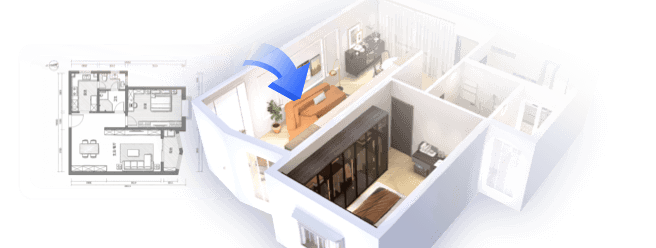
What began as an Autodesk innovation has evolved into a design platform used by more than 20+ million registered users (platform data, 2026) around the globe. Homestyler combines powerful rendering, an intuitive editor, and a vast furniture library to help you turn inspiration into photorealistic designs — whether you're redesigning a single room or planning an entire home.
If you’re planning a patio pot or want to see how spring colors will sit beside your outdoor furniture, try a quick layout in Homestyler. Then get the bulbs in the ground before winter makes the decision for you.
Дизайн сейчас бесплатно